
Die Benutzerhandbuch für Tapo C200C ist absichtlich nicht vollständig dargestellt. Sie soll die Komplexität des Installationsvorgangs veranschaulichen und Ihnen die wichtigsten Fakten vermitteln.
Introduction
When you are away from home, there is always something you care about. This is where the smart camera functions. No matter whether your child
is climbing the kitchen cabinet, or the pet is stealing snacks, the Pan/Tilt Home Security Wi-Fi Camera helps you stay with them anytime, anywhere.
Receive a notification whenever your camera detects motion and see a video clip of this motion to check everything.
– Motion Detection and Tracking – Whenever a camera detects motion, it will automatically follow the subject, keeping it within the camera’s field of view.
– Person Detection – Notifies you when a person is detected.
– Baby Crying Detection – Notifies you when your baby cries.
– 1080p Full High Definition – Provides greater sharpness and clarity.
– Night Vision up to 40 ft – Provides a visual distance of up to 40 ft in total darkness.
– Two-Way Audio – Communicate in real time through a built-in microphone and speaker.
– Field of View – 360º horizontal range.
– Customizable Block Zones – Set customizable block zones to keep private areas from being monitored.
– Cloud Storage Supported – Store videos by using cloud storage services.
* Subscribe for cloud storage at https://www.tapo.com/tapocare/.
– Local microSD Storage – Store up to 512 GB of video on a microSD card.
* microSD card needs to be purchased separately.
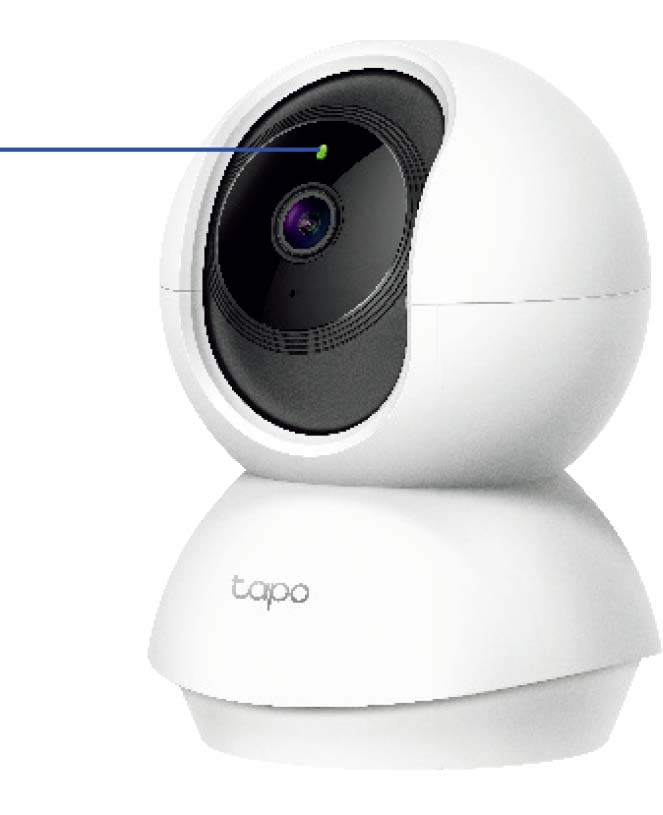
Appearance
The Pan/Tilt Home Security Wi-Fi Camera has a system LED that changes color according to its status, a lens, microphone, speaker, DC power port,
RESET button and a microSD card slot. Please refer below for details.
System LED
– Solid red: Starting up
– Blinking red and green: Ready for setup
– Blinking red slowly: Connecting to Wi-Fi
– Solid amber: Connected to Wi-Fi
– Solid green: Connected to the cloud
– Blinking red quickly: Camera resetting
– Blinking green quickly: Camera updating
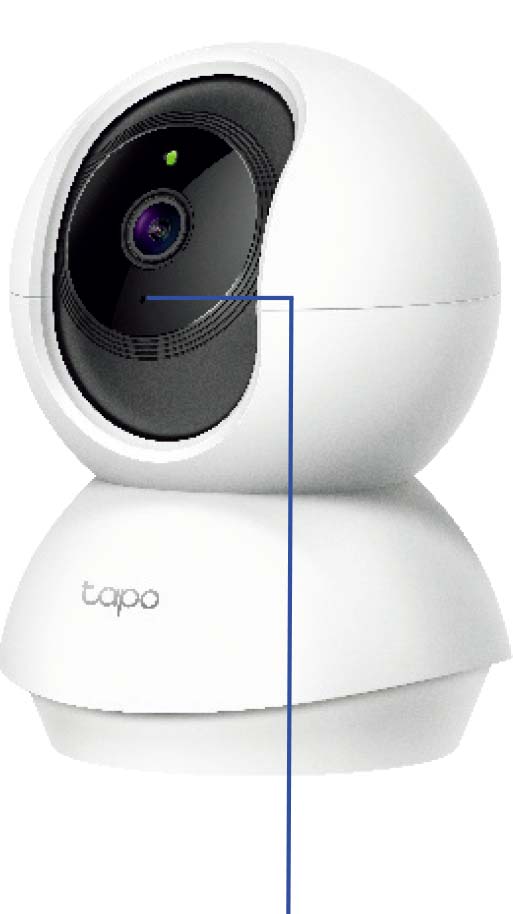
Microphone
Built-in microphone.
Note: Do NOT insert objects into the hole.

Speaker
Built-in speaker.
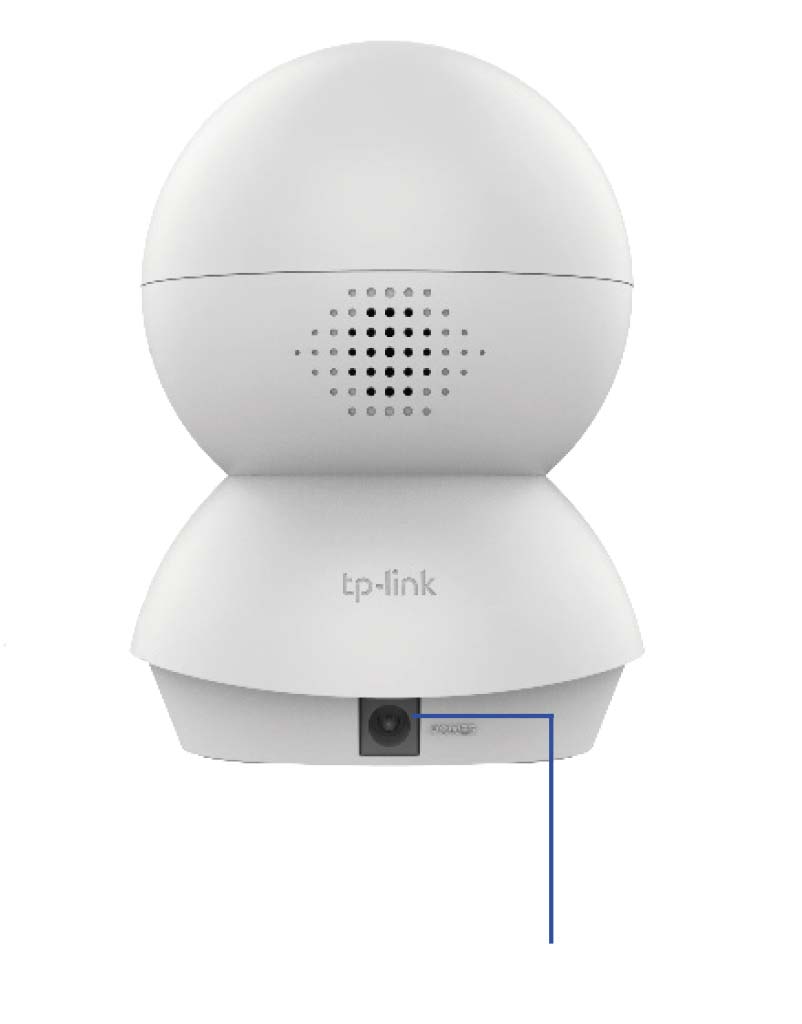
DC Power Port
Connect the power cord provided.
Lens
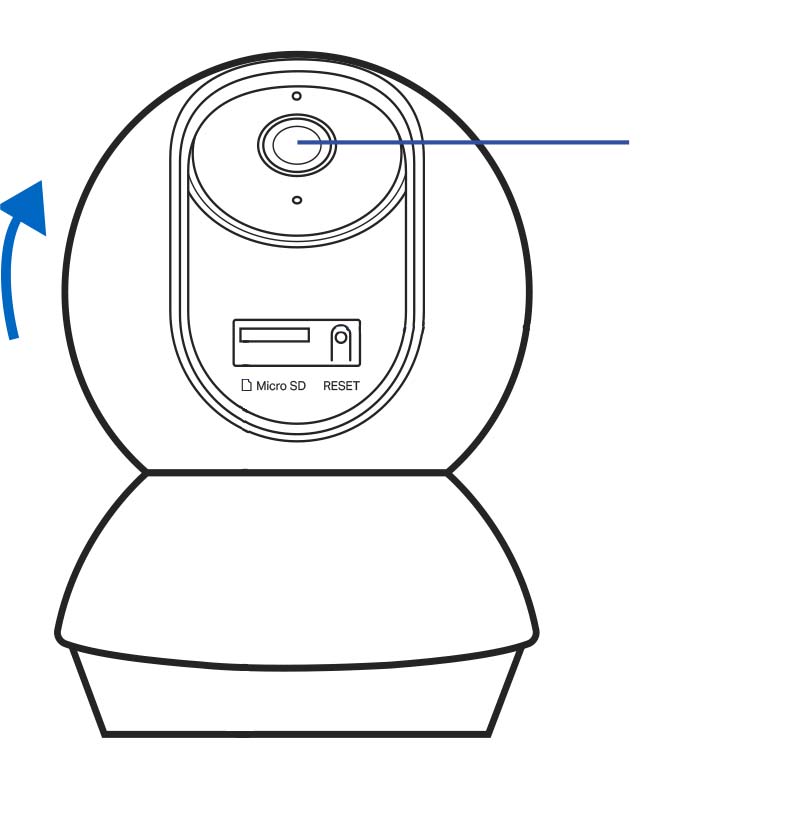
Reset Button
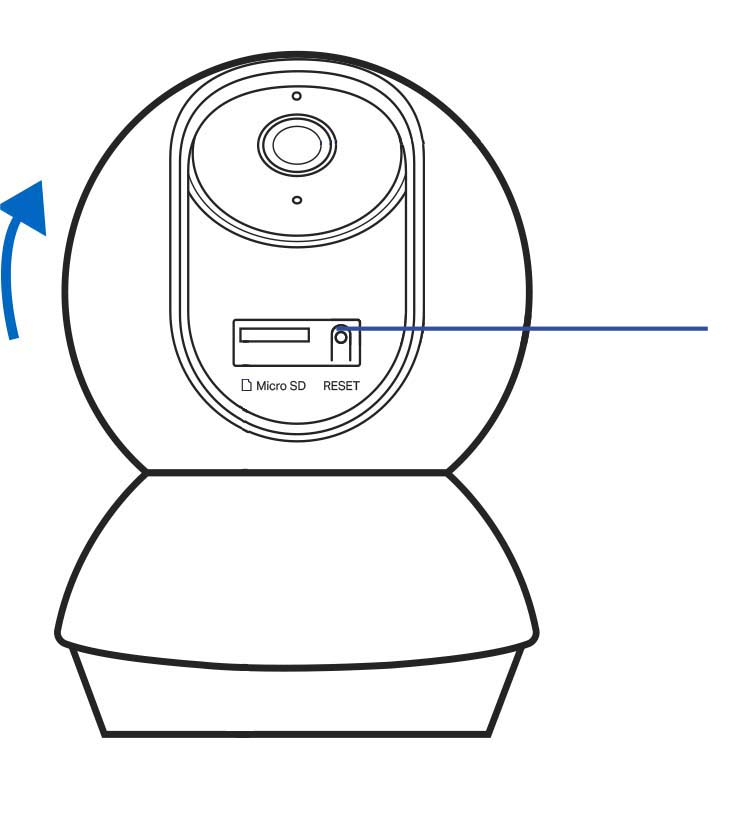
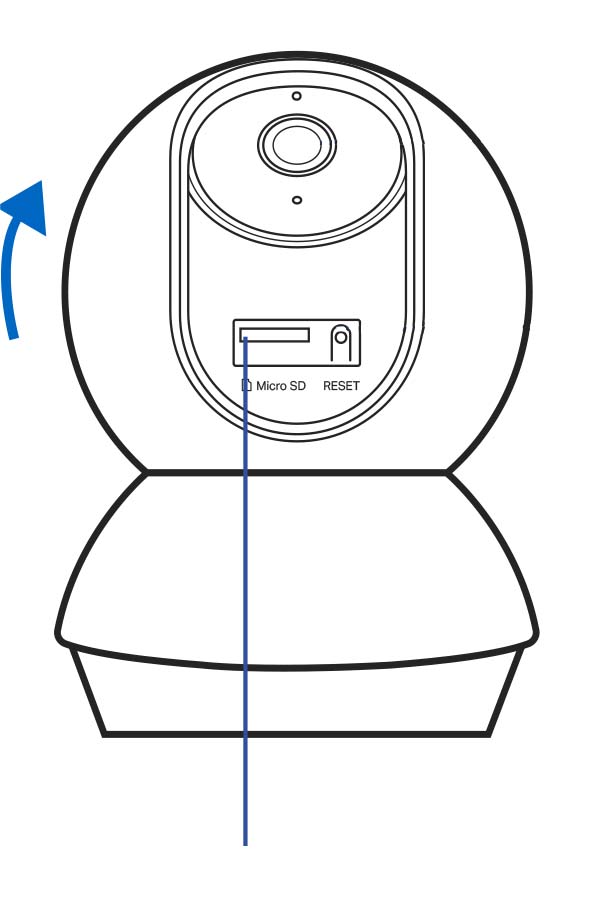
microSD Card Slot
Set Up Your Camera
Follow the steps below to get started with your new camera.
Step 1. Download Tapo App
Get the Tapo app from the App Store or Google Play, or by scanning the QR code below.

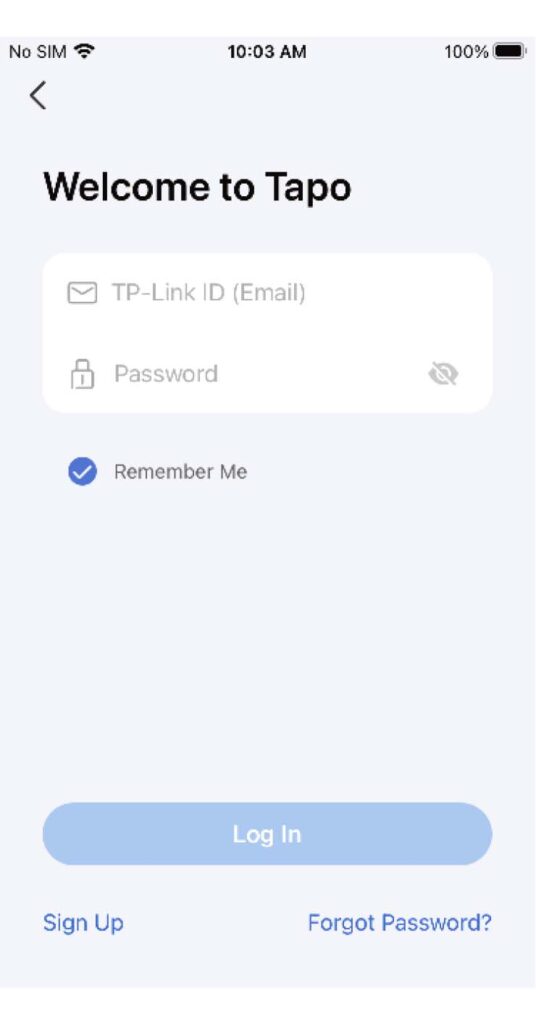
Step 2. Log In
Open the app, and log in with your TP-Link ID. If you don’t have an account, create one first.
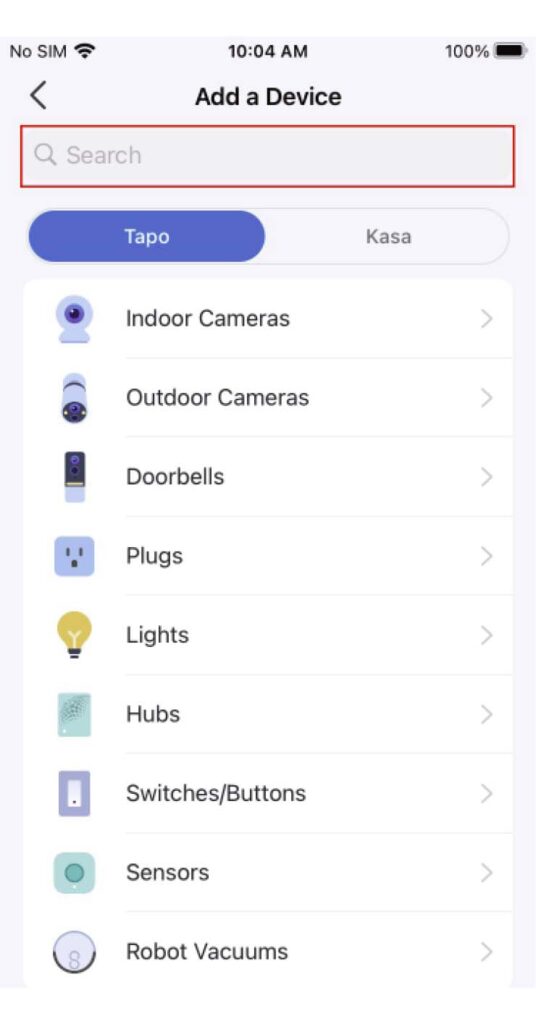
Step 3. Add Your Camera
Tap the + button > Add Device in the app and search for your model. Follow the app instructions to complete the setup.
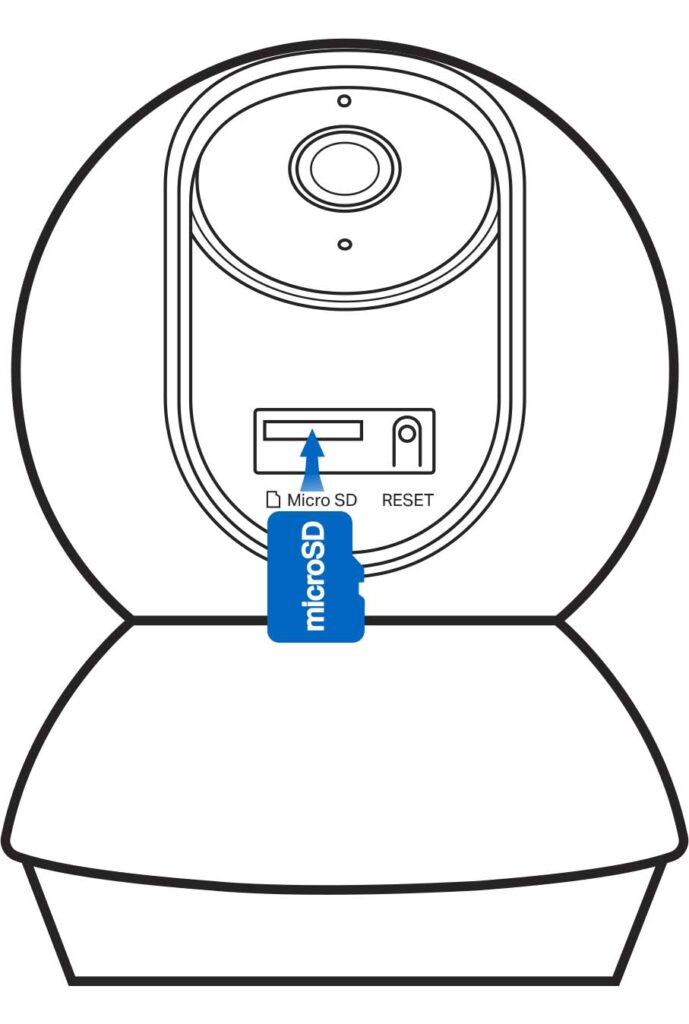
Install a microSD Card
Follow the steps below or follow the setup video at
https://www.tp-link.com/support/setup-video/#cloud-cameras
to install the microSD card for local recording. You can go to Camera Settings > Storage & Recording > microSD Card in the Tapo app to check the card status or format your card.
* Note: Please initialize the microSD card in the Tapo app first after inserting it.
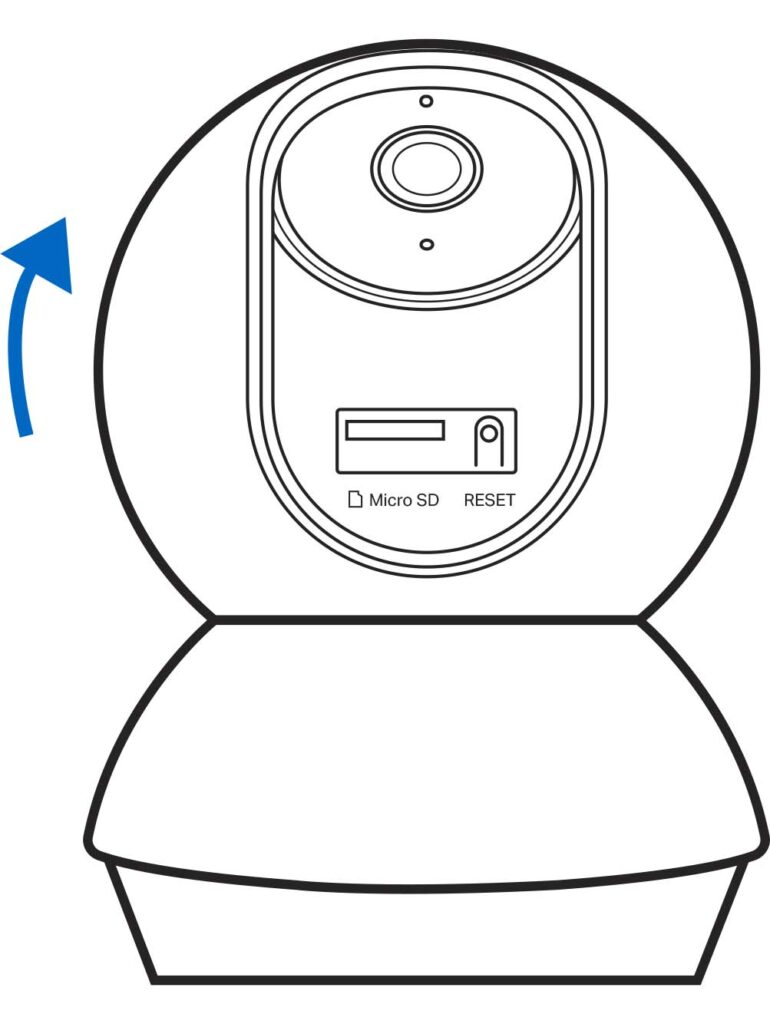
1 – Tilt the camera lens up and find the microSD card slot.
2 – Identify the direction of the microSD card and carefully insert the card into the slot. Push in the card until you hear a clicking sound.
Mount Your Camera
When you finish adding your camera in the Tapo app, you can set it on a flat surface such as a table or shelf. You can also mount it on a wall or ceiling with the provided mounting template and screws. Follow the steps below to mount your new camera or follow the setup video at
https://www.tp-link.com/support/setup-video/#cloud-cameras.
1 – Mark Position
Place the mounting template where you want the camera. For wall mounting, drill two holes through two circles.

2 – Affix Screws
Insert two mounting anchors into the holes, then screw the screws into the anchors.
Note: To securely attach the camera, ensure equidistant gaps (2 mm < A < 3 mm) between the two anchors and screws.
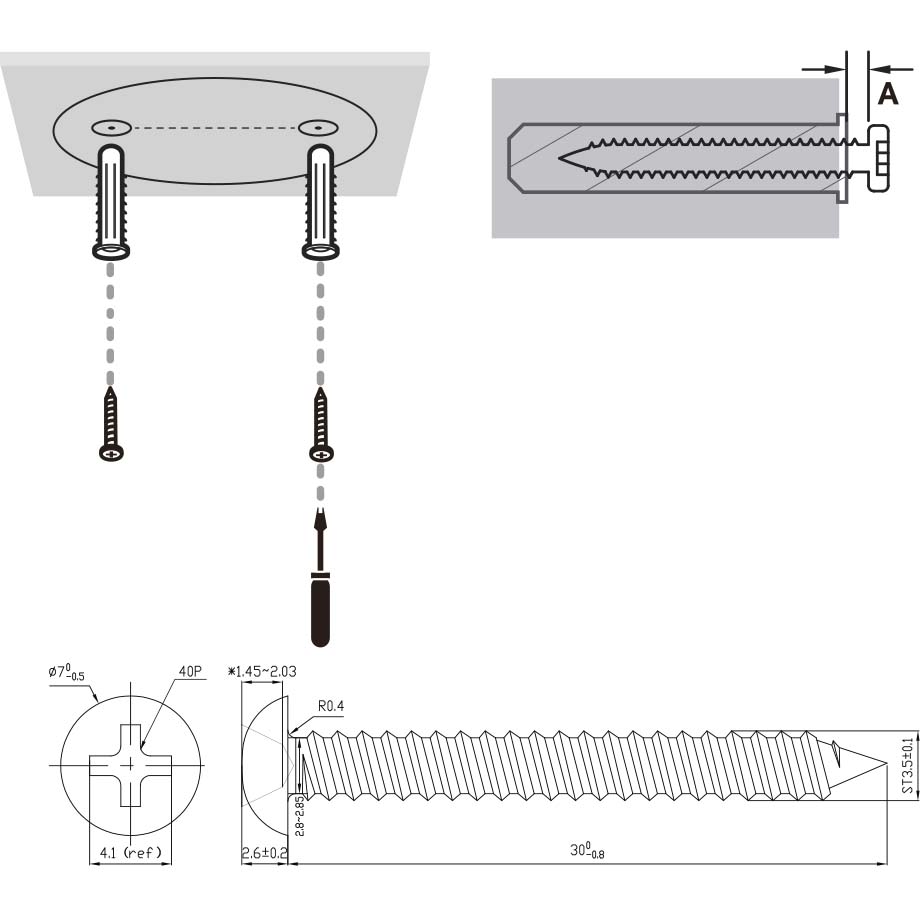
3 – Secure Camera
Hang the camera securely on the two screws. Ensure the camera is firmly attached. If not, adjust the distance between the anchors and screws until it is stable.

Reset Your Camera
Follow the steps below to reset your camera via the Reset button, or you can follow the setup video at https://www.tp-link.com/support/setupvideo/#cloud-cameras. You can also go to Camera Settings in the Tapo app and tap Remove Camera at the bottom to factory reset your camera.
1 – Manually rotate the camera downwards to find the Reset button.

2 – Press and hold the RESET button for at least 5 seconds until the LED blinks red quickly to reset the camera
Reset Button

Hier finden Sie eine detaillierte Beschreibung der Tapo C200C WLAN-Überwachungskamera
Tapo C200C WLAN-Überwachungskamera 1080p
Technische Details
Dimensionen: 8,6 x 8,5 x 11 cm
Bildsensor: 1/2.9“
Linse: F/NO: 2.4; Focal Length: 4mm
Nachtsicht: 850 nm IR LED bis zu 12m
Ansicht Bereich: 360° horizontal, 114° vertical
Auflösung: 1080p
Bildfrequenz: 15fps (15/20/25/30 fps)
Video-Komprimierung: H.264
Audiokommunikation: 2-way audio, Eingebautes Mikrofon und Lautsprecher
Drahtlose Datenrate: 11Mbps(802.11b), 54Mbps(802.11g), 150Mbps(802.11n)
Drahtlose Sicherheit: WPA/WPA2-PSK, 128 bit AES encryption with SSL/TLS
Betriebstemperatur: 0 bis +40°C
Betriebsfeuchtigkeit: 10-90% RH (kein Kondenswasser)
Material: Kunststoff
Spannung: AC/DC 9V, 0,6A
Gewicht: 118g
Besondere Merkmale: Unterstützt Micro SD-Karten (bis zu 512 GB), Kompatibel mit Google Assistant und Amazon Alexa
Zum Amazon Angebot